Transcription
How to Add Subtitles in Final Cut Pro X – the ultimate guide
10 Jan 2022
15 minute read
Table of contents
- Subtitles and Captions: What’s the Difference?
- Creating an .SRT file
- Creating Subtitles in Final Cut Pro X
- The advantages of adding subtitles in Final Cut Pro
- Some more features that may be useful
- How to customize your subtitles
- How to make your subtitles accessible and inclusive
- How you can create your subtitles with Amberscript
Subtitles are an important tool to engage with your viewers and ensure your video content makes an impact. If you want to learn how you can add subtitles into your Final Cut Pro X editing software, then this guide is for you!
Keep reading to learn more about captions and subtitles, how to add them into videos, and the benefits of doing so. We’ll also review how you can automatically create .SRT files by using the power of AI with Amberscript.
Subtitles and Captions: What’s the Difference?
The term subtitle refers to the text you see on your screen while watching a video. Their purpose is to translate all the spoken dialogue into written text so viewers can watch content in another language. Videos with subtitles assume that the person viewing them can hear audio cues but still need to translate the dialogue.
Although captions also translate the dialogue in the video, they also describe things like sound effects, audio cues, and music. This means that they can give additional context to the viewer even if they don’t have their sound on at all.
Creating an .SRT file
When you create video content in Final Cut Pro X, you must add subtitles to your final product. Follow this easy step by step process to get started:

1. Create an SRT File and Import It
The first step is to create a .SRT file. This unique file type includes a time-coded transcript for the video content so that you can import everything into Final Cut Pro X with minimal rearrangement or effort.
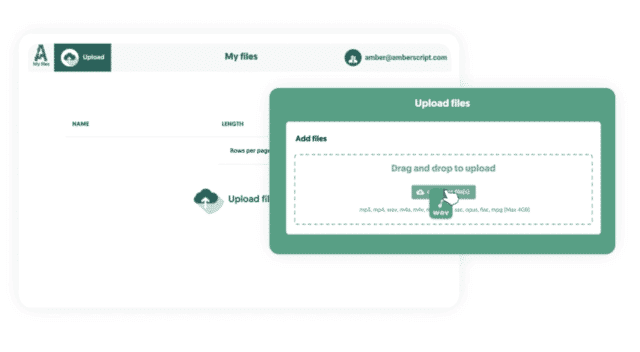
The good news is that you don’t need to create the .SRT file by hand – instead, use the automatic subtitle software provided by Amberscript! The platform includes a subtitle generator that helps you create the .SRT files from audio and video clips in minutes.
2. Generating automatic subtitles with Amberscript
Start by uploading the audio or video you want to add subtitles to and hit upload. Next, the artificial intelligence tool will start to create your transcript. Once it is complete, you can edit the file, add punctuation, and adjust grammar. When you are satisfied with the result, export it to your computer.
Additionally, you can export the subtitle in any format you want. Since you want your subtitle in the SRT file format, you pick that with optional timestamps or annotation. Learn more about different types of subtitle file formats
Creating Subtitles in Final Cut Pro X
1. After you have a completed .SRT File, it’s time to upload it into Final Cut Pro X

2. Once you uploaded the file, edit it based on your preferences
• Adjust the Subtitles as Needed
Although Final Cut Pro X will use the .SRT file as a starting point for the subtitles, you’ll likely need to make some adjustments. When you load the titles and text into your project, you must arrange the timing to ensure that everything lines as desired for your viewers.
To trim the subtitles, all you need to do is grab the block and crop it to the appropriate length. Drag and drop the titles to move them around – just do so with caution as they will overwrite existing captions when you place them on top.
• Format your Video File
So, you’ve got the subtitles uploaded and everything is in place – now what? At this point, you can choose to stylize the text or add some custom formatting to the video.
Remember that the goal of subtitles is to provide a simple solution for translating dialogue spoken in the video. However, there are times it makes sense to choose the font or the text color for the subtitles to help the viewer understand the additional context.
You can also emphasize specific parts of the subtitles by underlining them or using bold and italic formatting.
• Export your video
The last step to add subtitles in Final Cut Pro X is to export the video. There are two ways you can do this: a regular export or a caption role.
If you choose a regular export, you simply need to click File > Export and save the file accordingly. Note that the captions will not be included in the final product if you use this option.
To ensure that the video track includes the subtitles in the final export, you need to complete the following steps:
- Select Roles in the export window
- Click the Captions icon and select Burn in Captions
- Once you hit OK, it will close the window
- Choose File then Export as normal
Benefits of using Amberscript
Amberscript’s subtitle services are:

Fast
Edit your own text within minutes or leave the work to our experienced subtitlers.

Accurate
Our experienced subtitlers and thorough quality controls ensure 100% accuracy of your transcriptions and subtitles.

Easy
Thanks to a variety of integrations and API interfaces, you can fully automate your workflows.

Secure
Your data is in safe hands. We are GDPR compliant + ISO27001 & ISO9001 certified.
The advantages of adding subtitles in Final Cut Pro X
Now that you’ve learned how to add subtitles in Final Cut Pro X, you may be wondering, how can they be used to boost engagement? Including subtitles in your video content can improve overall engagement by connecting with users that keep their sound off, making your content accessible, and enhancing your SEO efforts.
1. Connect with Viewers that Keep Their Sound Off
You may be surprised to learn that most people that watch videos on their mobile devices do so without turning the sound on. Whether they are in a public place and can’t turn up the audio or simply do not have access to headphones, these users need subtitles to understand the context of your videos.
2. Make your Content Accessible
Another way that subtitles increase engagement is that it makes your content accessible to everyone. Individuals who are deaf or hard of hearing won’t be able to enjoy your videos to the fullest without the help of subtitles.
In other words, if you want to comply with accessibility requirements and ensure that everyone can engage with your brand, you should add subtitles to your videos.
3. Enhance your SEO
SEO, or search engine optimization, refers to creating content that allows your website to rank higher on the search engine results pages. You want to be the first result when someone Googles a topic you have shared a video about, right?
Unfortunately, search engine algorithms are not able to index video content alone. However, they can if you have subtitles and an attached transcript! Use that as an opportunity to improve your SEO efforts and engage with a broader range of viewers.
Some more features that may be useful
How to sync your subtitles with the video
Syncing subtitles with video is an important step in creating professional-looking videos, and Final Cut Pro X offers several tools and techniques to make the process easier and more accurate. One of the most effective methods for syncing subtitles with video is by using timecode. Timecode is a way of measuring the duration of a video based on a specific time format, such as hours, minutes, seconds, and frames. In Final Cut Pro X, you can use the timecode of your video and subtitle tracks to align the two and ensure that your subtitles appear at the correct moment. This can be done manually by entering the timecode values for each subtitle, or you can use Final Cut Pro X’s built-in synchronization tools to automatically match the timecode of your subtitle track with that of your video. With a little practice and attention to detail, syncing subtitles with video using timecode in Final Cut Pro X can be a straightforward and effective way to add professional-looking subtitles to your videos.
How to export your video and subtitles
Once you’ve added subtitles to your video in Final Cut Pro X, it’s important to export your video in a format that is compatible with different devices and platforms. Here’s a step-by-step guide to exporting subtitled videos from Final Cut Pro X in various formats and resolutions:
Step 1: Select your video in the timeline and go to File > Export.
Step 2: Choose the desired format and resolution for your exported video. You can select from a wide range of formats, including MP4, MOV, and ProRes.
Step 3: Click on the “Add Captions” checkbox to include the subtitles in your exported video.
Step 4: Choose the desired subtitle format, such as SRT or WebVTT.
Step 5: Adjust the settings, such as video and audio quality, and frame rate.
Step 6: Click on “Next” to choose the location where you want to save your exported video.
Step 7: Click on “Export” to begin the export process.
By following these simple steps, you can easily export subtitled videos from Final Cut Pro X in a variety of formats and resolutions. This will ensure that your content is accessible and compatible with different devices and platforms, making it easier for viewers to enjoy your videos with subtitles.
How to import and work with different formats (SRT, SCC)
Importing and working with subtitle files in different formats is an essential part of the subtitling process. Final Cut Pro X supports a variety of subtitle file formats, including SRT, and SCC, which can be imported and edited within the software.
To import a subtitle file, navigate to the “File” menu, select “Import,” and then choose the subtitle file you wish to import. Once imported, the subtitles will appear as a separate subtitle track in the timeline.
To edit the subtitles, double-click on the subtitle track to open it in the viewer window. From there, you can adjust the timing, duration, and text of each subtitle as needed.
It’s important to note that different subtitle file formats may have different formatting requirements, such as font size, color, and position on the screen. It’s important to ensure that the imported subtitle file is formatted correctly to ensure legibility on different types of screens and devices.
In summary, importing and working with subtitle files in different formats is an essential part of the subtitling process. Final Cut Pro X supports a variety of subtitle file formats, and it’s important to ensure that the imported subtitle file is formatted correctly to ensure legibility on different types of screens and devices.
Adapting your video to a vertical format
Final Cut Pro X is a powerful video editing tool that can be used to add subtitles to vertical videos for social media platforms like TikTok and Instagram. Here’s a step-by-step guide on how to add subtitles using Final Cut Pro X:
- Open Final Cut Pro X and create a new project with a vertical aspect ratio.
- Import your vertical video and subtitle files into the project.
- Drag the subtitle file onto the timeline and adjust the timing so that the subtitles appear at the right moments.
- Use Final Cut Pro X’s text tools to adjust the font size, style, and color of your subtitles.
- Position the subtitles so that they are not blocking important visuals in the video.
- Preview the video and make any necessary adjustments.
- Export the video with subtitles in the appropriate format and resolution for the social media platform.
By following these steps, you can add subtitles to your vertical videos for social media platforms like TikTok and Instagram using Final Cut Pro X. Adding subtitles can enhance the accessibility and engagement of your content, as well as increase the reach of your content to viewers who are deaf or hard of hearing. If you wanna know more about the specific platforms you can read our guide on TikTok closed captions, TikTok subtitles or Instagram subtitles.
How to use the role feature
Final Cut Pro X’s role feature is a powerful tool for organizing and managing subtitle tracks for multilingual projects. Here’s a step-by-step guide on how to use the role feature to streamline your subtitle workflow:
- Create a new project in Final Cut Pro X and import all of your video and subtitle files.
- Assign different roles to each language’s subtitles, for example, “English” and “Spanish.”
- Select the video clip and use the “Assign Roles” option in the “Modify” menu to assign the appropriate language role to the clip.
- Once the roles are assigned, create a new subtitle track for each language by clicking on the “Add Subtitle” button in the timeline and selecting the appropriate role.
- Add subtitles to each track and adjust the timing as necessary.
- Preview the video and make any necessary adjustments.
- Export the video with subtitles in the appropriate format and resolution.
By using Final Cut Pro X’s role feature to organize your subtitle tracks, you can streamline your workflow and ensure that each language’s subtitles are properly assigned and easily manageable. This can be especially useful for multilingual projects, where keeping track of multiple subtitles tracks can become overwhelming without proper organization.
Adding captions while live streaming
Creating subtitles for live video streaming events is a critical aspect of ensuring that your audience can fully engage with your content. Fortunately, Final Cut Pro X provides robust tools for creating and managing subtitles in real-time.
To create subtitles for live streaming events using Final Cut Pro X, you’ll first need to set up your project with the appropriate settings, including video and audio inputs, resolution, and aspect ratio. Once you’ve done that, you can use Final Cut Pro X’s built-in subtitle editor to create and edit your subtitles on-the-fly.
To make the process even smoother, you can use a dedicated hardware device, such as a subtitle encoder, to capture and stream your subtitles in real-time. These devices allow you to input your subtitle text and timing information directly into Final Cut Pro X, which can then be sent to your streaming platform.
When creating subtitles for live streaming events, it’s also essential to consider the placement and design of your subtitles. Be sure to use a font and color that are easy to read on a range of devices, and avoid obscuring any important visual elements in your video.
With these tips and Final Cut Pro X’s powerful tools, you can create professional-quality subtitles for your live streaming events that enhance accessibility and engagement for all viewers.
How to create and use templates
Subtitle templates in Final Cut Pro X are a great way to save time and maintain consistency across multiple videos. Here’s how to create and use subtitle templates in Final Cut Pro X:
- Create a new project and add the subtitles you want to use in your template.
- Once you have the subtitles in place, select them and go to Edit > Copy.
- Next, open the Titles and Generators panel by clicking on the Titles button in the top right corner of the screen.
- Select the template you want to use as a base and drag it onto your timeline.
- Click on the template to select it, and then go to Edit > Paste. This will paste the subtitles onto the template.
- Adjust the position and size of the subtitles as needed to fit the template.
- Once you’re happy with the layout of the subtitles, go to Edit > Save as Template.
- Give your template a name and description, and select the category where you want to save it.
- Click Save to create your new subtitle template.
To use your new subtitle template in a future project, simply select it from the Titles and Generators panel and drag it onto your timeline. Then, copy and paste your subtitles onto the template and adjust the position and size as needed. This will help you save time and maintain consistency across all of your videos.
How to customize your subtitles
Adding and using custom fonts
Adding custom fonts to use for subtitles in Final Cut Pro X can enhance the look and feel of your videos and make them more engaging and visually appealing. Here’s a step-by-step tutorial on how to do it:
Step 1: Download the font file that you want to use. The file should be in a supported format such as .ttf or .otf.
Step 2: Open the Font Book application on your Mac.
Step 3: Click on the “+” button at the bottom left corner of the Font Book window.
Step 4: Navigate to the location where you downloaded the font file, and select it.
Step 5: Click “Open” to install the font.
Step 6: Once the font is installed, open Final Cut Pro X and create a new subtitle text box.
Step 7: Click on the “Font” dropdown menu in the Inspector panel and select your custom font.
Step 8: Adjust the size and style of your subtitles as desired.
That’s it! With these simple steps, you can add custom fonts to use for subtitles in Final Cut Pro X and take your videos to the next level. If you are unsure which fonts to use, we have you covered with a list of he best fonts for subtitles.
Animating your subtitles
Creating stylized subtitles can add a unique and creative touch to your video, while also enhancing its visual appeal. Here are some tips for creating subtitles that match the tone and style of your video:
- Choose a font that matches the style of your video, such as a modern or vintage font for a contemporary or retro look.
- Experiment with different font sizes, colors, and styles to create a visual hierarchy and make the subtitles stand out.
- Consider adding background colors or outlines to the subtitles to make them more visible against different backgrounds.
- Use animation or motion graphics to add movement and interest to the subtitles.
- Keep the subtitles consistent throughout the video to maintain visual coherence.
- Avoid using too much text on the screen at once, as this can be overwhelming and distracting.
By following these tips, you can create stylized subtitles that match the tone and style of your video, adding an extra layer of creativity and visual interest. This can help to engage your viewers and enhance the overall viewing experience, making your video more memorable and impactful.
Detailed customization with advanced text tools
Final Cut Pro X provides a range of advanced text tools that allow you to customize the look and feel of your subtitles. Here are the steps to use Final Cut Pro X’s advanced text tools:
- Import your video and subtitle files into Final Cut Pro X.
- Select the subtitle file on the timeline and click on the “Text” button in the top toolbar.
- Use the text tools to customize the font, size, color, and style of your subtitles.
- You can also add outlines, drop shadows, and background colors to make the subtitles stand out.
- Use the “Transform” tool to adjust the position and size of your subtitles on the screen.
- Add animations or effects to your subtitles using Final Cut Pro X’s motion graphics tools.
- Preview your changes and make any necessary adjustments.
By using Final Cut Pro X’s advanced text tools, you can create customized subtitles that enhance the look and feel of your video. These tools can help to engage your viewers and make your content more visually appealing, while also making the subtitles easier to read and understand.
How to make your subtitles accessible and inclusive
Burning closed captions with Final Cut Pro X
Closed captions are essential for making video content accessible to viewers who are deaf or hard of hearing. Final Cut Pro X provides several tools for creating closed captions, making it easy to add captions to your videos. Here’s how to create closed captions in Final Cut Pro X:
Step 1: Create a new project and import your video.
Step 2: In the timeline, select the clip you want to add captions to.
Step 3: Click on the “Captions” button in the toolbar to open the captions editor.
Step 4: In the captions editor, select “Add Caption” and type in the text for your first caption.
Step 5: Use the timeline to set the in and out points for each caption.
Step 6: Adjust the caption style, font, and color to your liking.
Step 7: Export your video with the closed captions embedded.
By following these simple steps, you can create closed captions in Final Cut Pro X and make your videos more accessible to a wider audience. Closed captions are an essential tool for ensuring that everyone can enjoy and understand your content, regardless of their hearing ability. If you want to learn more about how closed captions work and why they are important, you can visit our blogpost where we explain this thoroughly.
Translating accurately and effectively
Please keep n mind that, to ensure accurate and effective subtitle translation, use a professional translator with experience in subtitle translation, consider cultural differences, keep text concise, adjust subtitle timing, ensure legibility and proper grammar, and double-check translations for accuracy and synchronization with video. Proper subtitle translation can increase accessibility and break down language barriers for a global audience.
If you want to know more about this topic you can read all about in our extensive subtitling guide.
Staying culturally sensitive and respectful
The best practices for creating culturally sensitive and respectful subtitles include working with qualified translators, using appropriate language and terminology, respecting cultural norms and diversity, considering visual presentation, and providing context. This approach will enhance the viewing experience and resonate with a global audience.
If you are working with a project for a global audience, we recommend you to check our subtitling guide for a detailed explanation.
How you can create subtitle for your videos with Amberscript?

Human-Made Subtitles
We already described how easy and fast it is to generate subtitles with the Amberscript software. On the other hand, in many cases you need 100% accurate transcripts. Luckily, Amberscript also offers professional services provided by native speakers in more than 15 languages.
Translated Subtitles
Our newest product is Translated Subtitles. Our team of native speakers will translate your audio into 15 languages ensuring up to 100% accuracy, so you can scale your content for a global audience.After uploading your files into your dashboard on our platform, our software will automatically generate your subtitles. This will be translated by our freelancers and our quality checker will make sure that everything is of the highest quality. You can export your file as a video with subtitles or the subtitles separately in Text, SRT, VTT or EBU-STL and many other formats.
Frequently asked questions
-
Can I burn the subtitles directly onto my video?
If you have exported the transcript as a SRT, EBU-STL or VTT file, you can easily burn them onto your video using video-editing software.
-
Can I export my files with timestamps?
Yes, you can. The transcript always includes timestamps in our online editor and you can choose to export the file with or without timestamps.
-
Do you add timestamps?
Yes, timestamps are included in the transcript.You can choose to export the transcript with or without timestamps.
-
Do you offer services in other languages?
For our human-made subtitling services we work with a network of language experts in 15 different languages. Find out which here. If the language you want is not on the list, please contact us through our contact form.
-
How do I add captions to a video on Vimeo?
To add captions to your Vimeo video, simply add the file you have created using Amberscript to your video in the editing window on Vimeo. Click on “distribution”, then “subtitles” and finally click on the + symbol to upload the SRT file.
-
To which languages can you translate subtitles?
For our human-made subtitling services we work with a network of language experts in 15 different languages. Find out which here. If the language you want is not on the list, please contact us through our contact form.
-
What subtitle file formats are supported?
Our software allows you to export the transcript from the video or audio file as an SRT, EBU-STL or VTT file.
-
Can I burn the subtitles directly onto my video?
If you have exported the transcript as a SRT, EBU-STL or VTT file, you can easily burn them onto your video using video-editing software.
-
How do I generate captions?
You can generate captions automatically using Amberscript. Our software allows you to export transcription based on audio/video files as SRT, EBU-STL or VTT files, which can easily be inserted into a video-editor. Want to know more? Here is a step-by-step guide.
-
How to become compliant with the WCAG 2.1?
To become compliant with the WCAG 2.1, it is important to ensure that all audio and video files and features on your website have a textual alternative and vice versa. Do you need to convert audio/video to text? Or do you want to generate captions/subtitles? You can use Amberscript to do so!